I'm learning how to paint on my iPad Pro by "tracing" stills from "Tinker Tailor Soldier Spy" and sharing the results here.
If you've been following along in my other recent posts, you'll notice that I have trouble painting faces. Faces are complex shapes - but more importantly, as human beings we're highly attuned to amazingly subtle nuances in shape and colour in a face. Very slight changes in a face's shape can show different emotions, health, ethnicity, and identity. This is why adding paint to a face or wearing a mask is a quick way to look uncanny or even fearsome. Trying to draw or paint a face that gives the same impression as a photographed original is probably the biggest technical challenge I'll be, um, facing in this project.
So this shot, which is all about the complex face of Toby Esterase (played by David Dencik) was going to be a challenge:

The background of this shot is not all that important and is even out of focus here, so I filled it in pretty quickly in rough watercolour washes. I'm getting better at rough sketches with Procreate, at least!
For Esterase, I actually used the technique I was going to try with the previous picture before I got sidetracked: fill in the broad shapes in solid colour and, draw on top with highlights and shadow, and finally mix them together with the brush itself or the smudge tool. I used the "Flat Marker" brush for the basic shapes, since it didn't have a lot of built-in texture. Then I either continued with Flat Marker or sometimes used "Wet Flat Brush" for highlights and shadows. It turned out that most of the action ended up happening with the smudge tool, mostly set at "Round Brush".
Procreate lets me express shapes quite nicely with the movement of the brush itself, but part of what made some of my earlier pictures look patchy was that a lot of the background showed through the otherwise expressive textures. I was able to mostly avoid that here by putting the expressiveness into the smudging rather than the colour application.
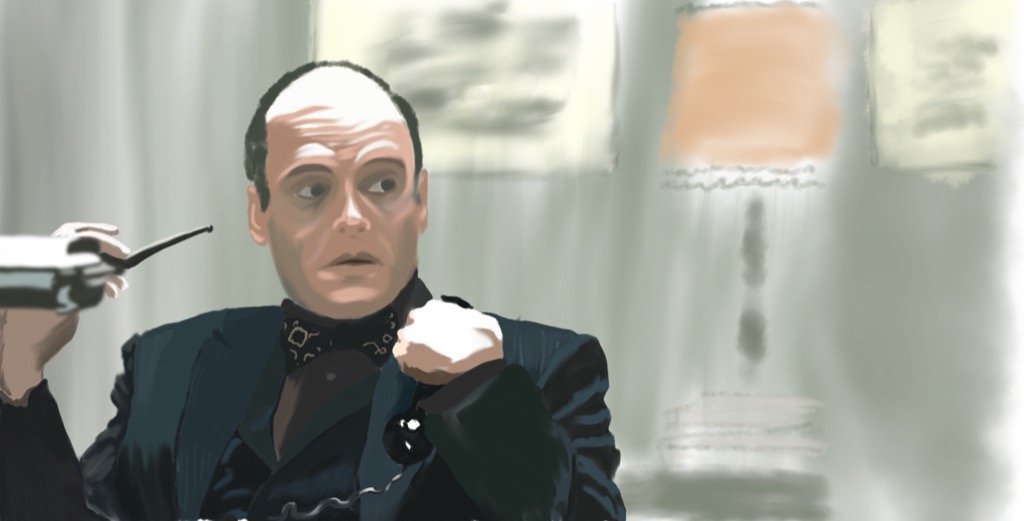
I even used a bit of "Gaussian Blur" on the lamp (or whatever it is) in the front left of the image, to give it a nice out-of-focus look.
The face, as predicted, took a lot of work. My first attempt ended up being a bit misshapen. The head had its own layer, so I simply hid the bad one and started over in a new layer. The lighting and shading here is quite dramatic, and he has rather deep-sunken eyes, so I had to fight against making him look too skeletal. I finally got something that felt good - but when I came back to the picture an hour or so later, I felt it really looked a lot like one of the aliens from They Live.


I used the colour adjustment tools to lower the contrast and lighten the image, and I adjusted his eyes - the very slightest difference in the size of eyes makes a huge difference in the final image.
While working on this I got better at my "tracing" technique. I would do rough shapes in pen on a semitransparent layer over the original. Then I would hide the original while I filled things in and smudged them into proper shape. At first I did this to make sure I was properly filling in all the colours properly (since it's easy to leave gaps when the original is already there filling them in for you) but I found the picture looked better if I didn't constantly refer back to the original image for reference.
In the end it's much more important to work with the painting on its own terms rather than simply as a copy of an original still.
That said, though, I found myself going back several times to figure out the face - discovering subtle highlights and shapes that led to huge improvements in the believability of the face. Figuring out these subtleties is part of why I'm doing this project in the first place. Although it's still far from perfect, it's certainly the best face I've done so far.